- Someone joins your whop;
- Someone leaves your whop; and
- Someone checks out your store page but doesn’t buy.
How to find the automated messages settings
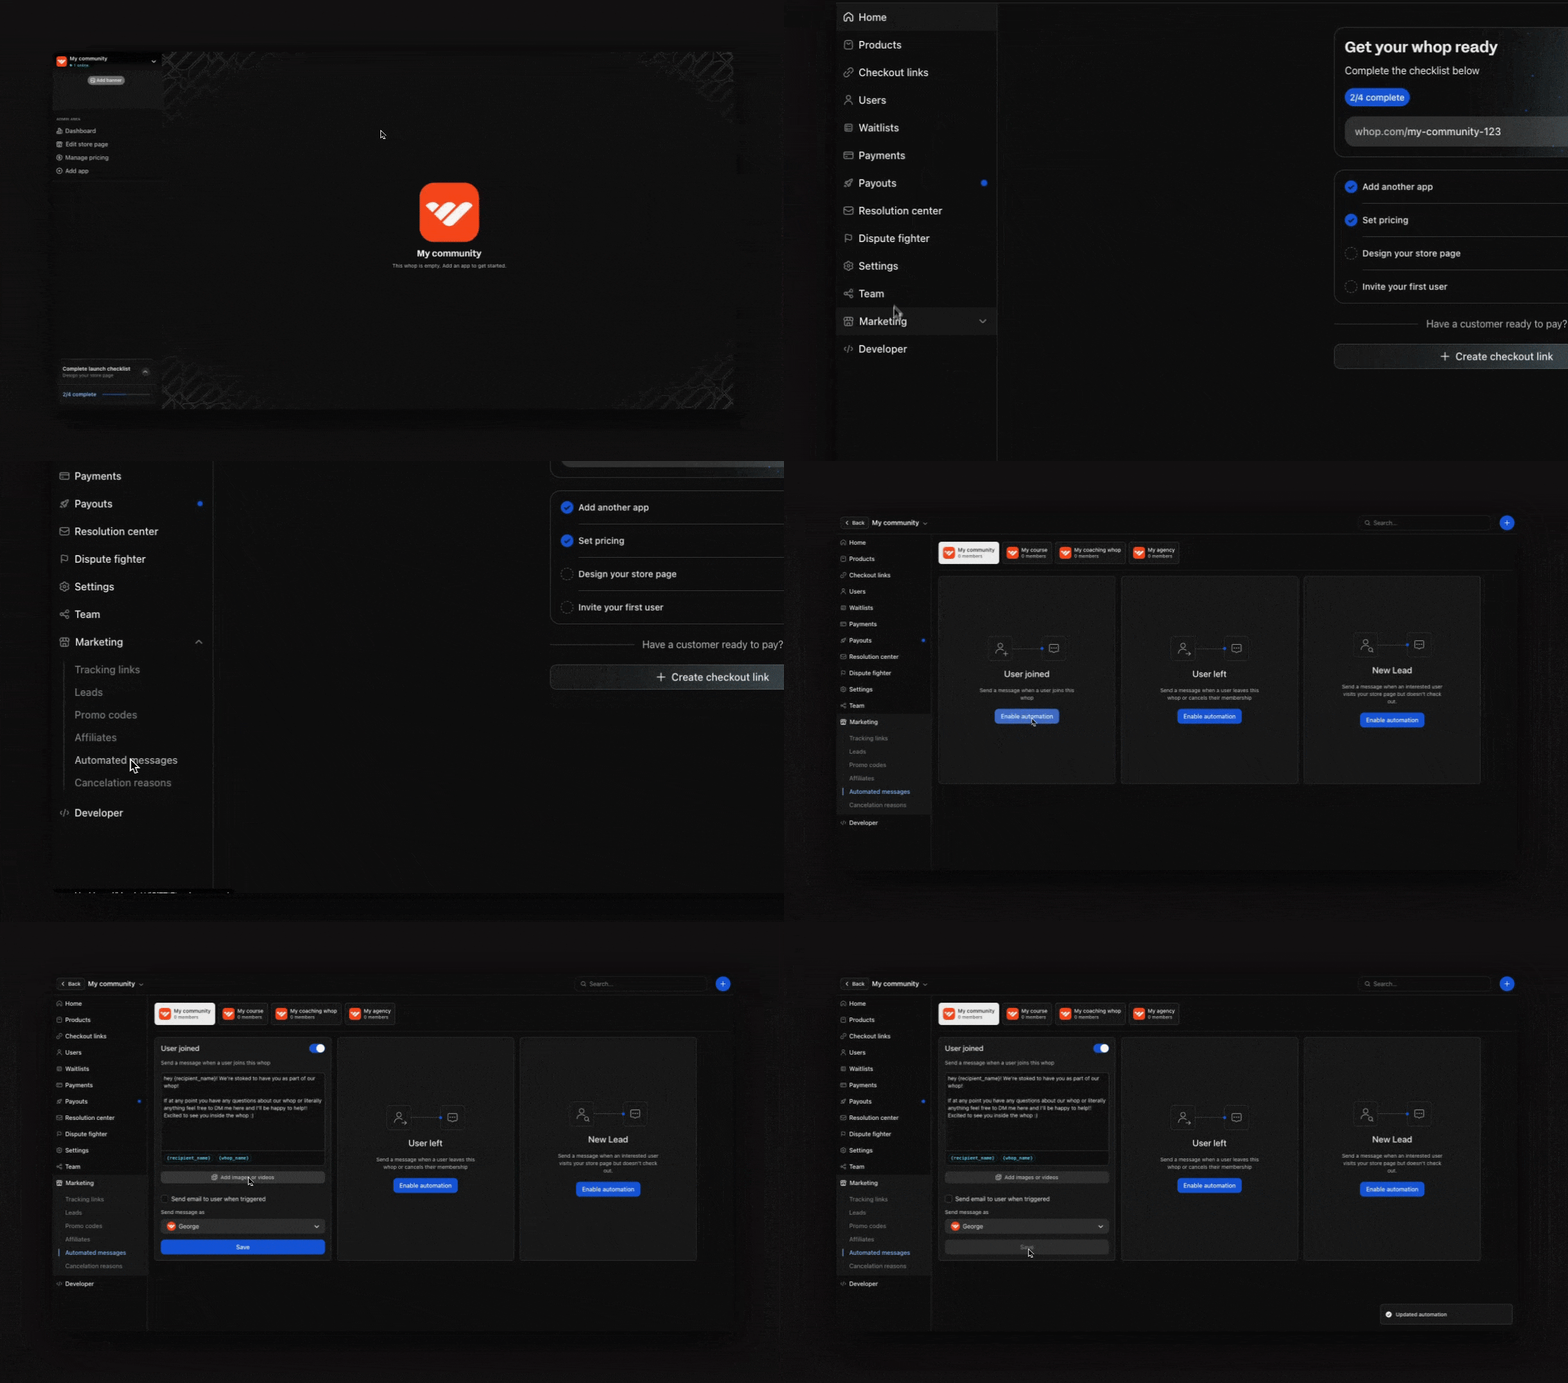
- Open your Dashboard: From your Whop account, click Dashboard on the left side of your screen to access your whop’s advanced settings.
- Find Automated messages: Under the Marketing section in your sidebar, click Automated messages.

How to set up ‘User joined’ messages
Send welcome messages automatically when new members join your whop. Use this feature to greet new members, let them know what their next steps should be, or upsell your higher ticket offers (potentially even offering a discount code).1
Enable the automation
Click Enable automation on the User joined card to activate this automated message.
2
Set up your automated message
After enabling, you’ll see several customization options:
- Toggle button: Turn this on or off anytime (top right)
- Message field: Write the message that’s sent to new members
- Variables: Add these variables to personalize the message:
- recipient_name - Shows their actual name
- whop_name - Shows your whop’s name
- Add media: Upload images or videos to your message
- Send email option: Check this box if you want users to also receive an email notification (in addition to the DM on Whop)
- Send message as: Select which team member the message should appear to come from
3
Save your settings
Click Save to activate your User joined automation.
How to set up ‘User left’ messages
Send a message when someone leaves your whop and decides they don’t want to be a member anymore. Use this feature to gather feedback (to learn why they left), or even try entice them back with a discount.1
Enable the automation
Click Enable automation on the User left card to activate this automated message.
2
Set up your automated message
After enabling, you’ll see several customization options:
- Toggle button: Turn this on or off anytime (top right)
- Message field: Write the message that will be sent to churned members
- Variables: Add these variables to personalize the message:
- recipient_name - Shows their actual name
- whop_name - Shows your whop’s name
- Add media: Upload images or videos to your message
- Send email option: Check this box if you want users to also receive an email notification (in addition to the DM on Whop)
- Send message as: Select which team member the message should appear to come from
3
Save your settings
Click Save to activate your User left automation.
How to set up ‘New lead’ messages
Send messages to people who click on your popup promotions.1
Enable popup promotions on Whop
Before setting up New lead messages, enable popup promotions on your store page.
Set up popup promotions
Learn how to set up popup promotions on your store page.
2
Enable the automation
Click Enable automation on the New lead card to activate this automated message.
3
Set up your automated message
- Toggle button: Turn this on or off anytime (top right)
- Message field: Write the message that will be sent to new leads
- Variables: Add these variables to personalize the message:
- recipient_name - Shows their actual name
- whop_name - Shows your whop’s name
- store_page_url - Direct link to your store page
- discount_percentage - The discount percentage from your popup promotion
- Add media: Upload images or videos to your message
- Send email option: Check this box if you want users to also receive an email notification (in addition to the DM on Whop)
- Send message as: Select which team member the message should appear to come from
4
Save your settings
Click Save to activate your New lead automation.

