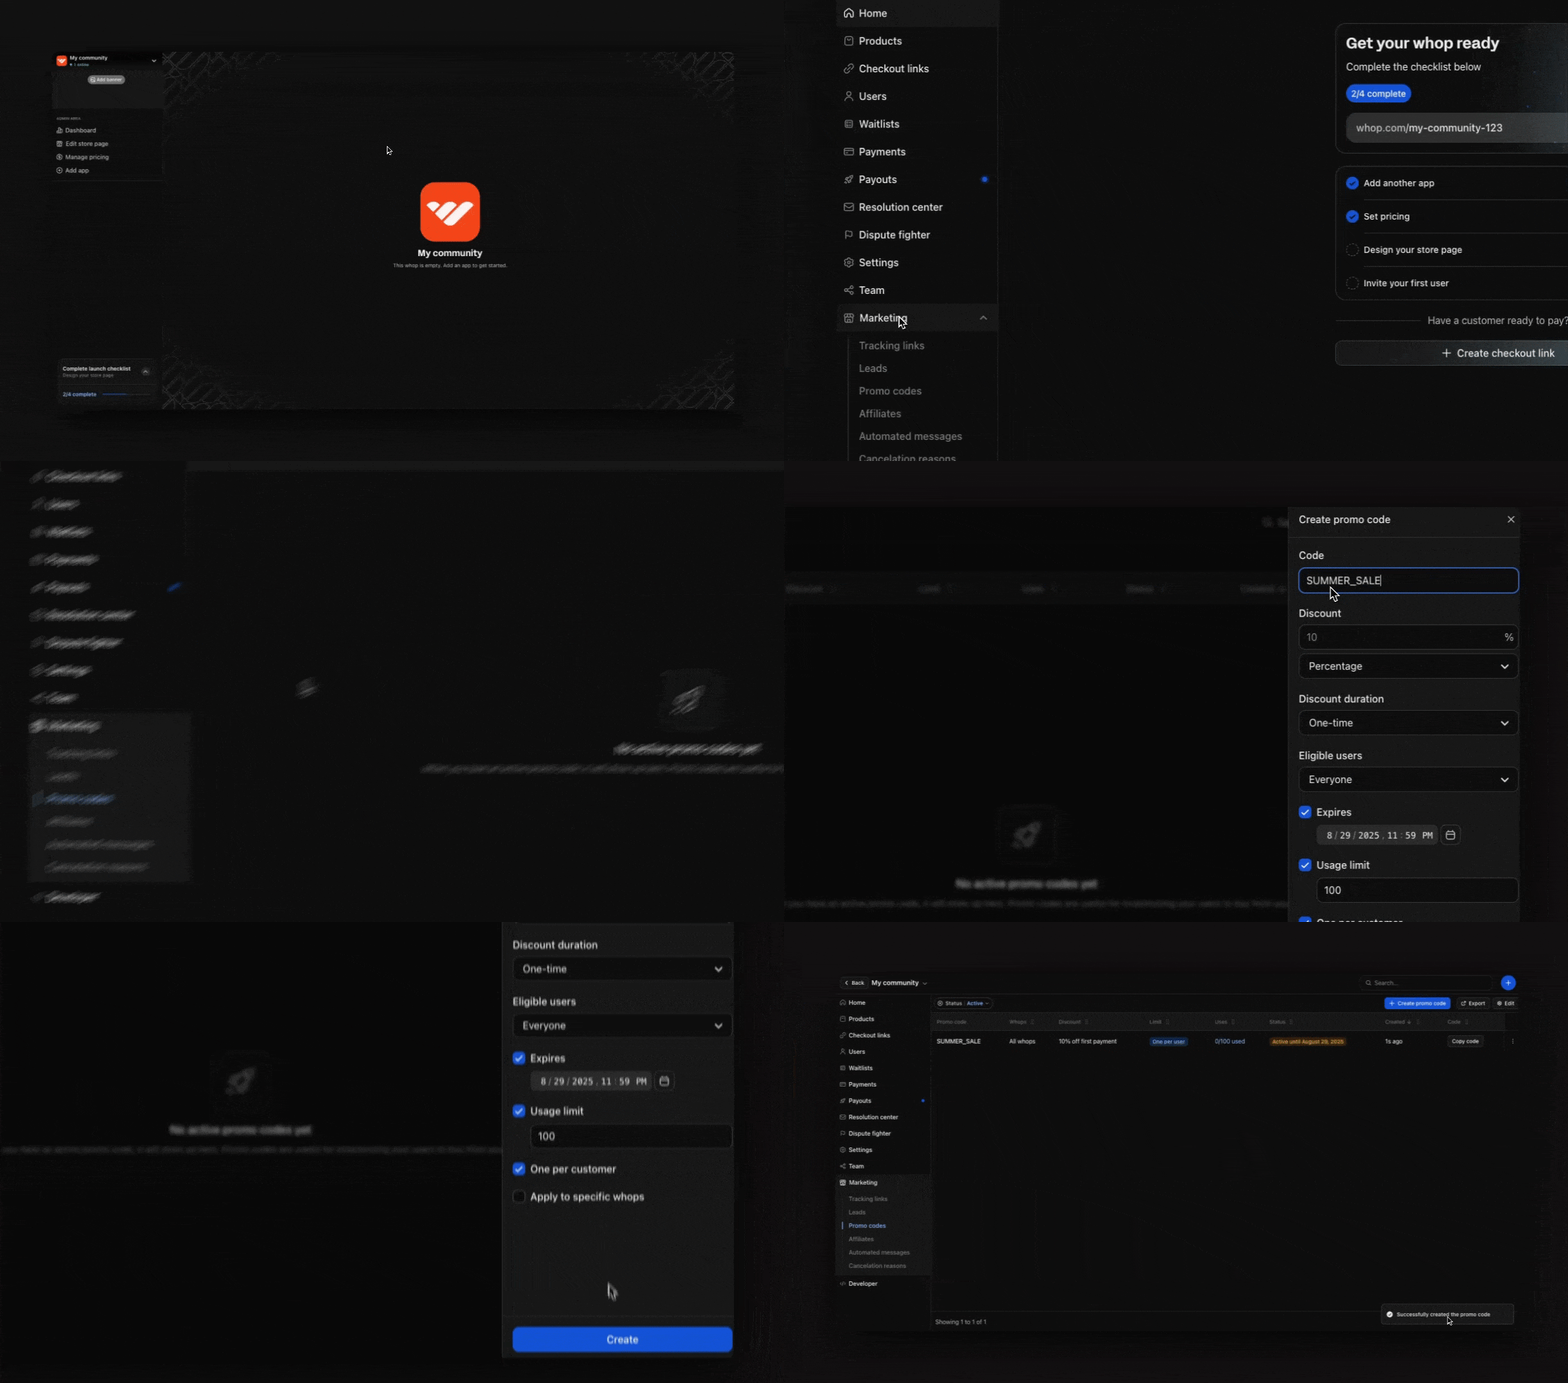
How to create a promo code
1
Access your dashboard
Head over to your Dashboard.
2
Navigate to Promo codes
Click the Marketing dropdown and select Promo codes. You’ll see any existing promo codes you’ve already created for your whop here.
3
Create a new code
If this is your first promo code, click + Create Promo Code in the center of your page. If you’ve already created a promo code (and you want to create a new one) click + Create promo code at the top right of your screen. A popup will appear where you’ll set up your code.
4
Set up your promo code
Configure the settings for your promo code:
- Code: This is the actual promo code name, like “SAVE20” or “WELCOME10.” Type what you want your code to be called.
- Discount: Decide how much your discount will be
- Use the dropdown to pick either a Percentage (like 10% off) or a Fixed amount (like $10 off).
- Then, enter the discount value in the field above the dropdown.
- Discount duration: Decide how long the discount applies
- One-time (default): The discount is applied only once.
- Forever: The discount applies to all future payments.
- Multiple months: The discount applies for a specific number of months (a field will pop up for you to enter the number).
- Eligible users: Who can use this code?
- Everyone (default): Anyone can use it.
- Only new: Only new customers can use this code.
- Only churned: Only previous customers who have left can use it.
- Expires: Set when the promo code expires using the date and time selector. This is enabled by default and set to one month from creation.
- Usage limit section: Enter the maximum number of times this code can be used. Default is set to 100 uses.
- One per customer: If you enable this, each customer can only use the promo code once. This is enabled by default.
- Apply to specific whops: This is off by default. If you turn it on, you can limit the promo code to certain checkout links within your organization.
5
Activate your code
Click Create at the bottom of the popup to make your promo code live.

Manually expire a promo code
If you need to deactivate a promo code before its set expiration date, you can manually expire it.- Access the promo code options: Click the three dots (︙) next to the promo code you want to expire.
- Click Expire: Select Expire from the dropdown menu that appears.
- Confirm expiration: A confirmation message will pop up. Click Expire to permanently deactivate the promo code.

